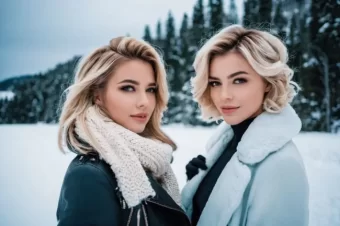
How To: Hairstyles For Wedding Guests: 10 Most Beautiful Variants With Step-By-Step Guide
Attending a wedding is always a special occasion, and choosing the perfect hairstyle can add the finishing touch to your overall look. Whether you're a close friend, a relative, or just a cherished guest, finding the right hairstyle that complements both the event and your personal style is crucial.


Here are 10 beautiful variants with step-by-step guide of hairstyles for wedding guests that will leave you looking effortlessly chic and ready to celebrate the joyous occasion.
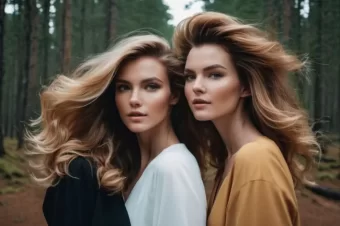
Romantic Updo with Soft Curls
Create a timeless and romantic look with an updo adorned with soft curls. This elegant hairstyle adds a touch of sophistication and complements both long and short dresses.


Creating a Romantic Updo with Soft Curls for a wedding or any special occasion is a beautiful and timeless choice. Here's a step-by-step guide to achieving this romantic hairstyle:
Materials Needed:
- Curling iron or wand
- Heat protectant spray
- Comb or brush
- Hair elastics
- Bobby pins
- Hairspray
- Decorative hair accessories (optional)
Step-by-Step Guide:
- Start with Clean and Dry Hair: Begin by washing your hair and allowing it to dry completely. If your hair tends to be slippery, you might want to add some texture by applying a bit of mousse or texturizing spray.
- Apply Heat Protectant: Before using any heat styling tools, apply a heat protectant spray to prevent damage to your hair.
- Create Soft Curls: Use a curling iron or wand to create soft curls throughout your hair. Take small sections and wrap them around the barrel, holding for a few seconds before releasing. Continue until all of your hair is curled. For a more natural look, curl random sections in different directions.
- Tease the Crown: Gently tease the crown of your head to add volume. This step is optional but can contribute to the overall romantic and soft appearance of the updo.
- Section the Hair: Section off the top half of your hair, leaving the bottom half down. This will be the hair you use for the updo.
- Create a Low Bun: Gather the top section of your hair and twist it into a low bun at the nape of your neck. Secure the bun with bobby pins, making sure it feels secure but still has a soft and relaxed appearance.
- Incorporate Soft Curls: Take the remaining curls from the bottom half of your hair and gently drape them over the bun, securing with bobby pins as needed. Allow some curls to frame your face for a romantic touch.
- Secure Loose Ends: Make sure all loose ends are secured with bobby pins, and arrange the curls in a way that looks soft and effortless. You can also use hairspray to set the curls in place.
- Final Touches: Add any decorative hair accessories, such as a flower crown, decorative pins, or a delicate headband, to enhance the romantic vibe of the updo.
- Set with Hairspray: Once you're satisfied with the arrangement of your updo, set the style with a light mist of hairspray to ensure it stays in place throughout the event.


With these steps, you can achieve a Romantic Updo with Soft Curls that complements the romantic atmosphere of a wedding. Remember to practice the hairstyle beforehand to ensure you're comfortable with the process, and customize it to suit your personal style and preferences.
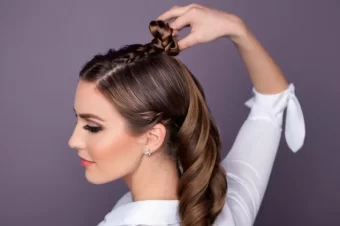
Bohemian Braided Crown
Embrace your inner bohemian spirit with a braided crown. This whimsical hairstyle adds a touch of boho-chic and works well with both formal and more laid-back wedding settings.


Creating a Bohemian Braided Crown is a beautiful and free-spirited hairstyle that's perfect for weddings, festivals, or any special event. Follow this step-by-step guide to achieve a stunning Bohemian Braided Crown:
Materials Needed:
- Comb or brush
- Hair elastics
- Bobby pins
- Texturizing spray or dry shampoo (optional)
- Decorative hair accessories (optional)
Step-by-Step Guide:
- Start with Clean and Textured Hair: Begin with clean, dry hair. If your hair is too clean and slippery, you might want to add some texture by spraying texturizing spray or using dry shampoo.
- Part Your Hair: Create a center part or a deep side part, depending on your preference. This will determine how the braids fall on each side.
- Begin Braiding: Start a regular three-strand braid near your hairline on one side. Braid towards the back of your head, picking up small sections of hair as you go. Continue braiding until you reach the nape of your neck.
- Repeat on the Other Side: Repeat the braiding process on the opposite side of your head, creating a symmetrical look. Ensure that the braids are similar in size and length.
- Secure the Ends: Secure each braid with a small hair elastic at the end. This will prevent them from unraveling as you work on the crown.
- Cross the Braids: Bring one braid across the back of your head, positioning it like a crown. Use bobby pins to secure it in place, tucking the ends underneath the opposite braid. Repeat the process with the other braid, crossing it over the first braid.
- Secure the Crown: Use bobby pins to secure the braids in place, ensuring they form a continuous crown around your head. Tuck any loose ends underneath the braids to create a seamless look.
- Adjust and Loosen: Gently pull on the sides of the braids to loosen them slightly, creating a more relaxed and bohemian vibe. This step adds to the effortless and carefree nature of the style.
- Final Touches: If desired, you can add decorative hair accessories such as flowers, beads, or pins to enhance the bohemian aesthetic.
- Set with Hairspray: Once you're satisfied with the braided crown, set the style with a light mist of hairspray to keep it in place.


FOLLOW US


The Bohemian Braided Crown is a versatile and romantic hairstyle that suits various occasions. Feel free to customize it by incorporating twists, incorporating flowers, or leaving a few loose strands for a more relaxed look. Practice the style beforehand to ensure you achieve the desired bohemian charm for your special event.
Classic Hollywood Waves
Channel your inner Hollywood starlet with classic waves. This glamorous hairstyle suits a variety of hair lengths and adds a touch of vintage charm to your wedding guest ensemble.


Creating Classic Hollywood Waves is a glamorous and sophisticated hairstyle that harks back to the golden age of Hollywood. Follow this step-by-step guide to achieve this timeless and elegant look:
Materials Needed:
- Curling iron or wand
- Heat protectant spray
- Sectioning clips
- Comb or brush
- Hair clips or pins
- Hair spray
- Shine spray or serum (optional)
Step-by-Step Guide:
- Start with Clean and Dry Hair: Begin with freshly washed and completely dry hair. If your hair tends to be slippery, apply a small amount of mousse or styling foam to add texture.
- Apply Heat Protectant: Spritz your hair with a heat protectant spray to shield it from the heat of the styling tools.
- Section Your Hair: Divide your hair into sections using clips. You may want to create three or four sections: one at the back and two or three on the sides.
- Curling Technique: Take a small section of hair and wrap it around the curling iron or wand, holding for a few seconds. For classic Hollywood waves, you want to create large, loose curls. Repeat this process for each section, alternating the direction of the curls to achieve a more natural look.
- Clip and Cool: After curling each section, clip the curl in place to allow it to cool and set. This helps the curls hold their shape for a longer duration.
- Release and Finger Comb: Once all sections are curled and cooled, release the clips and let the curls fall naturally. Use your fingers to gently comb through the curls, creating soft waves.
- Shape the Waves: Use a comb to shape the waves into the desired Hollywood wave pattern. Comb through the curls in an "S" shape, alternating the direction for a more authentic Hollywood look.
- Pin and Secure: Pin any sections or waves that need extra support or shaping. This step ensures that your waves stay in place throughout the event.
- Set with Hairspray: Generously spray your hair with a flexible hold hairspray to set the waves and keep them in place. Hold the hairspray about 12 inches away from your hair to achieve an even distribution.
- Add Shine (Optional): If you desire extra shine, you can finish the look by applying a small amount of shine spray or serum to your waves. This step enhances the glamour of the Classic Hollywood Waves.


Classic Hollywood Waves are a red carpet-worthy hairstyle that exudes elegance. Practice the technique to perfect the styling process, and feel free to adapt the size and shape of the waves to suit your personal preferences. With this step-by-step guide, you'll be ready to showcase a timeless and sophisticated look for any special occasion.
FOLLOW US
Side-Swept Chignon
For a polished and refined look, opt for a side-swept chignon. This timeless hairstyle is perfect for a formal wedding and pairs well with statement earrings or a delicate hair accessory.


Creating a Side-Swept Chignon is a classic and sophisticated hairstyle that's perfect for formal events, including weddings. Follow this step-by-step guide to achieve an elegant and polished look:
Materials Needed:
- Comb or brush
- Hair elastics
- Bobby pins
- Hair donut or bun maker (optional)
- Hair spray
- Decorative hairpins or accessories (optional)
Step-by-Step Guide:
- Start with Clean and Dry Hair: Begin with clean and dry hair. If your hair is too clean and slippery, you may want to add some texture by applying a bit of mousse or texturizing spray.
- Side Part Your Hair: Create a side part based on your preference. The side with more hair will be the side where the chignon is formed.
- Brush Your Hair: Use a comb or brush to smooth your hair and eliminate any tangles. This step is crucial for achieving a neat and polished look.
- Gather Hair to the Side: Gather all your hair to one side, opposite to the side of the part. This is where you'll be creating the chignon.
- Form a Low Ponytail: Secure your gathered hair into a low ponytail at the nape of your neck. Use a hair elastic to hold it in place.
- Create a Bun or Chignon: There are two methods to create the bun:
Traditional Method: Twist the ponytail and wrap it around the base, forming a classic bun. Secure it with bobby pins as you go.
Using a Hair Donut: Alternatively, you can use a hair donut or bun maker to create a fuller and more voluminous chignon. Slide the hair donut over the ponytail, spread your hair evenly around it, and secure with bobby pins. - Sweep Hair Over the Chignon: Gently sweep the remaining hair over the chignon, covering it completely. This creates a side-swept effect and adds a touch of elegance to the hairstyle.
- Secure with Bobby Pins: Use bobby pins to secure any loose strands and ensure that the chignon stays in place. Tuck in the ends of your hair neatly.
- Set with Hairspray: Spritz your hair with hairspray to set the style and prevent any flyaways. Choose a hairspray with a flexible hold for a natural look.
- Add Decorative Accessories (Optional): If desired, you can enhance the elegance of the Side-Swept Chignon by adding decorative hairpins or accessories. This step is optional but can elevate the overall look for a special occasion.


The Side-Swept Chignon is a timeless and versatile hairstyle suitable for various formal events. Practice the steps to master the technique, and feel free to customize the chignon based on your hair's length and thickness. With this guide, you'll achieve a sophisticated and polished look that complements any special occasion.
Half-Up Half-Down with Twists
FOLLOW US
Strike the perfect balance between casual and formal with a half-up half-down hairstyle featuring twists. This versatile look complements a range of outfits and is suitable for various wedding themes.


Creating a Half-Up Half-Down hairstyle with twists is a versatile and stylish look suitable for various occasions. Follow this step-by-step guide to achieve an effortlessly chic and romantic hairstyle:
Materials Needed:
- Comb or brush
- Hair elastics
- Bobby pins
- Curling iron or wand (optional)
- Hair spray
- Decorative hair accessories (optional)
Step-by-Step Guide:
- Start with Clean and Dry Hair: Begin with clean, dry hair. If you prefer a more textured look, you can add some waves or curls using a curling iron or wand.
- Part Your Hair: Create a middle part or a side part, depending on your preference. This will determine how the twists and waves fall on each side.
- Section the Hair: Use your fingers or a comb to section off the top half of your hair. The exact amount will depend on your preference, but typically, you want to separate the hair from ear to ear.
- Create the Twists: Take a small section of hair from one side and begin twisting it away from your face. As you twist, incorporate additional small sections of hair into the twist as you move toward the back of your head. Repeat on the other side.
- Secure the Twists: Once you've twisted both sides, bring them together at the back of your head. Secure the twists with a small hair elastic to create a half-up ponytail.
- Tease the Crown (Optional): For added volume, you can gently tease the hair at the crown of your head before creating the half-up ponytail. This step is optional but can enhance the overall look.
- Create Waves (Optional): If you haven't curled your hair earlier, you can create loose waves in the remaining hair that's left down. Use a curling iron or wand to add soft curls for a romantic touch.
- Secure with Bobby Pins: Use bobby pins to secure any loose strands and ensure that the twists stay in place. Tuck in the ends neatly for a polished appearance.
- Set with Hairspray: Spritz your hair with a light hold hairspray to set the style and keep the twists and waves in place. Hold the hairspray about 12 inches away for an even application.
- Add Decorative Accessories (Optional): To elevate the look, you can add decorative hair accessories such as pins, clips, or a delicate headband. This step is optional but can add a touch of elegance or bohemian flair.


The Half-Up Half-Down with Twists hairstyle is a lovely balance between casual and formal, making it suitable for a variety of occasions. Practice the steps to perfect the technique, and feel free to customize the look based on your personal style and the formality of the event. With this guide, you'll achieve a effortlessly chic and romantic hairstyle.
Low Bun with Floral Accents
Elevate your hairstyle with a low bun adorned with delicate floral accents. This feminine and romantic choice adds a touch of natural beauty to your overall look, making it ideal for spring and summer weddings.
FOLLOW US


Creating a Low Bun with Floral Accents is a beautiful and romantic hairstyle that's perfect for weddings, garden parties, or any special event. Follow this step-by-step guide to achieve an elegant and feminine look:
Materials Needed:
- Comb or brush
- Hair elastics
- Bobby pins
- Small flowers or floral accessories (real or artificial)
- Hair spray
- Decorative hairpins (optional)
Step-by-Step Guide:
- Start with Clean and Dry Hair: Begin with clean, dry hair. If your hair is too clean and slippery, you may want to add some texture by applying a bit of mousse or texturizing spray.
- Part Your Hair: Create a middle part or a side part based on your preference. This will determine how the bun is positioned.
- Brush Your Hair: Use a comb or brush to smooth your hair and eliminate any tangles. This step is crucial for achieving a neat and polished look.
- Gather Your Hair: Gather all your hair at the nape of your neck, ensuring it's smooth and free of bumps. Use a hair elastic to secure it into a low ponytail.
- Create the Bun: Twist the ponytail and wrap it around the base to form a low bun. Secure the bun with bobby pins, making sure it feels secure but still has a soft and relaxed appearance.
- Prepare the Floral Accents: If you're using real flowers, trim the stems and arrange them in a small bundle or as individual flowers. If you're using artificial flowers, make sure they are securely attached to clips or hairpins.
- Insert the Flowers: Tuck the floral accents into the bun, distributing them evenly. You can place them all around the bun or concentrate them on one side, depending on your preference.
- Secure with Bobby Pins: Use bobby pins to secure the flowers in place. Make sure they are inserted securely into the bun to prevent them from falling out.
- Adjust and Loosen: Gently pull on the sides of the bun to loosen it slightly, creating a more relaxed and romantic appearance. This step adds to the overall softness of the hairstyle.
- Set with Hairspray: Spritz your hair with a light hold hairspray to set the style and keep the bun and floral accents in place. Hold the hairspray about 12 inches away for even distribution.
- Add Decorative Hairpins (Optional): If desired, you can enhance the hairstyle further by adding decorative hairpins or clips. This step is optional but can add a touch of glamour or elegance.


A Low Bun with Floral Accents is a timeless and enchanting hairstyle that suits various occasions. Customize the look by choosing flowers that complement your outfit or the event's theme. With this step-by-step guide, you'll achieve a romantic and feminine hairstyle that's perfect for celebrating special moments.
Messy Bun with Sparkling Hairpins
Embrace a relaxed and carefree vibe with a messy bun adorned with sparkling hairpins. This chic and effortless style is perfect for outdoor weddings and adds a touch of glamour to your appearance.


FOLLOW US
Creating a Messy Bun with Sparkling Hairpins is a chic and effortless hairstyle that's perfect for both casual and formal occasions. Follow this step-by-step guide to achieve a relaxed yet glamorous look:
Materials Needed:
- Comb or brush
- Hair elastic
- Bobby pins
- Sparkling hairpins or decorative hair accessories
- Texturizing spray or dry shampoo (optional)
- Hair spray
Step-by-Step Guide:
- Start with Clean or Textured Hair: Begin with clean, dry hair. If your hair is too clean and slippery, you may want to add some texture by using texturizing spray or dry shampoo.
- Create Texture (Optional): If your hair is straight and you desire more texture, use a curling iron or wand to add loose waves or curls. This step is optional and depends on your personal preference.
- Gather Your Hair: Flip your hair over and gather it into a high ponytail at the crown of your head. Secure the ponytail with a hair elastic.
- Tease the Ponytail: Gently tease the ponytail to add volume and create a slightly messy texture. This step enhances the undone and relaxed look of the bun.
- Create the Messy Bun: Twist the teased ponytail loosely around the base to form a messy bun. Secure the bun with bobby pins, leaving some strands loose to maintain the messy and effortless appearance.
- Add Sparkling Hairpins: Insert sparkling hairpins or decorative accessories into the bun. You can scatter them randomly or create a specific pattern, depending on your preference. Make sure they are securely placed to add a touch of glamour.
- Pull Out Face-Framing Strands: Gently pull out a few strands of hair around your face to create a soft and relaxed frame. This step adds to the overall casual and undone vibe of the messy bun.
- Secure Loose Strands (Optional): If there are any loose strands or flyaways that you'd like to control, use bobby pins to secure them. However, embracing a few loose strands contributes to the messy and carefree look.
- Set with Hairspray: Spritz your hair with a light hold hairspray to set the style. Hold the hairspray about 12 inches away for an even application. This step helps keep the messy bun in place throughout the day or night.
- Final Touches: Take a moment to adjust the bun and hairpins as needed. Ensure that the sparkling hairpins are evenly distributed for a balanced and glamorous look.


A Messy Bun with Sparkling Hairpins is a versatile hairstyle that adds a touch of sophistication to a relaxed and casual look. Experiment with different hairpin placements and embrace the imperfect nature of the messy bun. With this step-by-step guide, you'll achieve a stylish and effortless hairstyle for various occasions.
Ponytail with a Twist
Give the classic ponytail a wedding-worthy twist by incorporating braids or twists. This modern and stylish choice works well for both daytime and evening celebrations.


FOLLOW US
Creating a Ponytail with a Twist is a modern and stylish hairstyle that adds a unique twist to the classic ponytail. Follow this step-by-step guide to achieve a sleek and chic look:
Materials Needed:
- Comb or brush
- Hair elastic
- Bobby pins
- Hair serum or styling gel (optional)
- Decorative hair accessory (optional)
Step-by-Step Guide:
- Start with Clean and Dry Hair: Begin with clean, dry hair. If you want a smoother look, you can apply a small amount of hair serum or styling gel to control any frizz or flyaways.
- Brush Your Hair: Use a comb or brush to smooth your hair, ensuring it's free of knots and tangles.
- Create a High Ponytail: Gather your hair into a high ponytail at the crown of your head. Secure the ponytail tightly with a hair elastic.
- Divide the Ponytail: Divide the ponytail into two equal sections.
- Twist One Section: Take one section of the ponytail and twist it tightly. The tighter the twist, the more defined the look will be. Repeat the twisting process with the second section.
- Cross the Twists: Cross the twisted sections over each other, creating an "X" shape. This step adds an interesting and stylish element to the ponytail.
- Secure with Bobby Pins: Use bobby pins to secure the crossed twists in place. Tuck the ends of the twists underneath the ponytail to hide them.
- Conceal the Hair Elastic: Take a small section of hair from the ponytail and wrap it around the hair elastic to conceal it. Secure the wrapped section with a bobby pin.
- Smooth and Refine (Optional): Use a comb or your fingers to smooth any bumps or imperfections in the twists. This step ensures a polished and sleek finish.
- Set with Hairspray: Spritz your hair with a light hold hairspray to set the style and keep any flyaways in check. Hold the hairspray about 12 inches away for even distribution.
- Add Decorative Hair Accessory (Optional): If desired, you can enhance the Ponytail with a Twist by adding a decorative hair accessory, such as a clip, ribbon, or scrunchie. This step is optional but can add a touch of personal style.


A Ponytail with a Twist is a simple yet stylish hairstyle that works well for various occasions, from casual outings to more formal events. Experiment with the tightness of the twists and the placement of the ponytail to customize the look according to your preferences. With this step-by-step guide, you'll achieve a modern and chic hairstyle in no time.
Sleek High Ponytail
Make a statement with a sleek high ponytail. This contemporary and edgy hairstyle adds a touch of drama to your look and is perfect for those who want to stand out at the wedding.


Creating a Sleek High Ponytail is a polished and sophisticated hairstyle that's perfect for a sleek and modern look. Follow this step-by-step guide to achieve a stylish and sleek high ponytail:
FOLLOW US
Materials Needed:
- Comb or brush
- Hair elastic
- Hair serum or styling gel
- Hair spray
- Fine-tooth comb (optional)
- Decorative hair accessory (optional)
Step-by-Step Guide:
- Start with Clean and Dry Hair: Begin with clean, dry hair. Washing and conditioning your hair before styling will help achieve a sleek and polished look.
- Brush Your Hair: Use a comb or brush to smooth your hair thoroughly, ensuring that there are no knots or tangles.
- Apply Hair Serum or Styling Gel: Apply a small amount of hair serum or styling gel to your hair. Focus on the crown and sides to control frizz and create a smooth texture.
- Create a High Ponytail: Gather your hair into a high ponytail at the crown of your head. Ensure the ponytail is positioned where you want it—this is typically at the top or slightly above the crown.
- Secure with a Hair Elastic: Use a hair elastic to secure the ponytail tightly. Make sure it feels secure and sits at the desired height.
- Smooth the Sides: Use a fine-tooth comb or your fingers to smooth the sides of your hair. This step helps achieve a sleek and polished appearance.
- Conceal the Hair Elastic: Take a small section of hair from the ponytail and wrap it around the hair elastic to conceal it. Secure the wrapped section with a bobby pin to ensure it stays in place.
- Add Hair Spray: Spritz your hair with a generous amount of hairspray to set the style and keep any flyaways in check. Hold the hairspray about 12 inches away for an even application.
- Optional: Create a Sleek Part: If you prefer a parted look, use the fine-tooth comb to create a sleek part. This step adds an extra touch of sophistication to the high ponytail.
- Optional: Add a Decorative Hair Accessory: For a stylish finishing touch, you can add a decorative hair accessory such as a scrunchie, ribbon, or hairpin to the base of the ponytail. This step is optional but can enhance the overall look.


A Sleek High Ponytail is a versatile and elegant hairstyle suitable for various occasions, from formal events to everyday wear. Experiment with the placement and tightness of the ponytail to customize the look according to your preferences. With this step-by-step guide, you'll achieve a sleek and polished high ponytail effortlessly.
Textured Low Ponytail
Achieve an understated yet elegant look with a textured low ponytail. This simple yet sophisticated hairstyle is versatile and complements a range of outfits, making it an excellent choice for any wedding celebration.


Creating a Textured Low Ponytail is a chic and effortless hairstyle that adds a relaxed vibe to your look. Follow this step-by-step guide to achieve a stylish and textured low ponytail:
Materials Needed:
- Comb or brush
- Hair elastic
- Texturizing spray or dry shampoo
- Bobby pins
- Hair spray
- Decorative hair accessory (optional)
Step-by-Step Guide:
- Start with Clean or Textured Hair: Begin with either clean, dry hair or add some texture by using texturizing spray or dry shampoo. The added texture will enhance the overall look of the low ponytail.
- Brush Your Hair: Use a comb or brush to smooth your hair, eliminating any knots or tangles.
- Create a Low Ponytail: Gather your hair into a low ponytail at the nape of your neck. Secure the ponytail with a hair elastic. Choose the desired tightness based on your preference.
- Add Texture: Use texturizing spray or dry shampoo throughout the length of the ponytail to create a textured and lived-in look. Scrunch the ponytail with your hands to enhance the texture.
- Tease the Crown (Optional): For added volume and texture, gently tease the hair at the crown of your head. This step is optional but can contribute to a more laid-back and undone appearance.
- Pull Out Face-Framing Strands: Gently pull out a few strands of hair around your face to create a soft and relaxed frame. This step adds to the overall casual vibe of the textured low ponytail.
- Secure with Bobby Pins (Optional): If there are any loose strands that you'd like to secure or shape, use bobby pins as needed. Embracing a few loose strands contributes to the textured and effortless look.
- Set with Hairspray: Spritz your hair with a light hold hairspray to set the style and keep the texture in place. Hold the hairspray about 12 inches away for an even application.
- Optional: Add a Decorative Hair Accessory: If you want to elevate the look, you can add a decorative hair accessory, such as a scrunchie, ribbon, or hairpin, to the base of the ponytail. This step is optional but can add a touch of style.


A Textured Low Ponytail is a versatile and trendy hairstyle that works well for various occasions, from casual outings to more laid-back events. Customize the look by adjusting the tightness of the ponytail and the amount of texture you add. With this step-by-step guide, you'll achieve a stylish and effortless textured low ponytail.
Remember to consider the wedding's theme, your outfit, and your personal style when choosing the perfect hairstyle. With these 10 beautiful variants, you'll be sure to turn heads and feel confident as you celebrate the love and joy of the special day.


Comments